Tutorial
This guide explains how to create artwork in SQUARED: Layers, Patterns, Shapes, Image Mockup, Custom Toppings, and saving/restoring full projects as JSON.
Quick start
- Open Editor.
- Choose the size of the canvas (tables). Decide whether you want to work in full size or in a reduced view fitted to your screen. If you want to reduce the canvas size, use Adjust Size in the side panel. You can also find the same option in the top bar as a small button.
- Decide whether the grid lines should be visible or hidden. You can switch them on or off with the GRID: OFF / GRID: ON controls in the side panel.
- Set your table background and grid colors using the color pickers in the left side panel. The larger color circle selects the table background, and the smaller circle selects the grid line color. If you enable the second background color, you can create a background gradient that stretches across the whole table or applies to a single row (one of 10 rows).
Tools
1) Layersbuild structure layer by layer
Where to find it
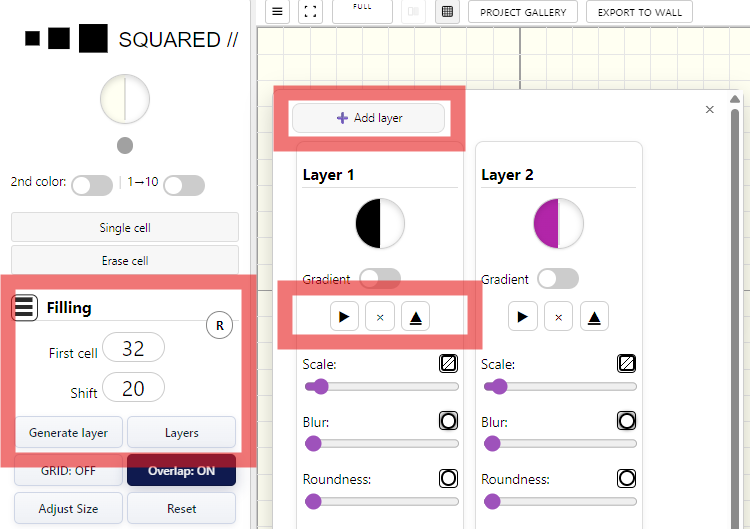
In the Layers workflow, First cell defines the starting cell and Shift defines the offset value. After pressing Generate layer (the play button in the Layers submenu), the editor fills the remaining cells in a new table using that offset while copying the content of the previous layer.
Each layer is independent. You can build as many layers as you want. Add them manually with Add layer or use Generate layer as a faster shortcut when you want to create the next layer and continue the sequence immediately.
Example
2) Patternsgenerate pattern-based layers
Where to find it
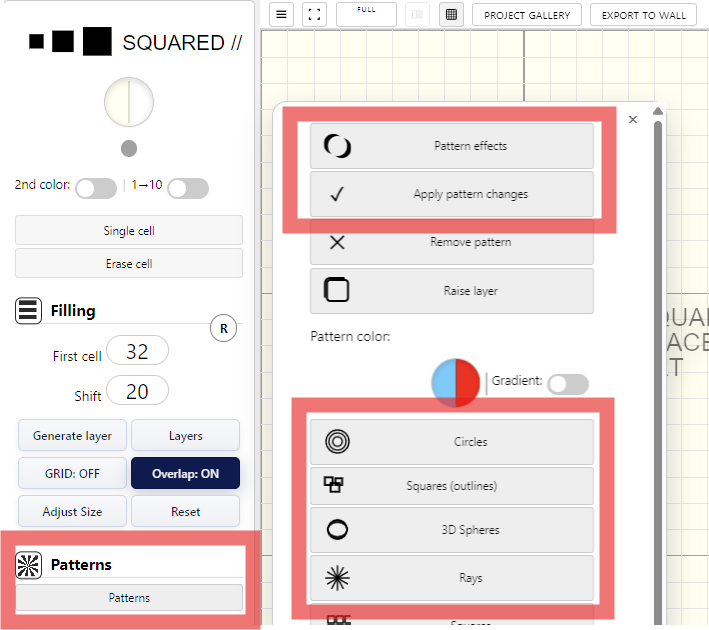
Every pattern layer is generated after selecting one of the predefined patterns. A single click on a pattern generates it randomly in a new position.
If you want to keep the generated result permanently in the tables, confirm it with Apply pattern changes.
If you want to add another new pattern afterwards, you must click Add new pattern. Otherwise, new patterns stay blocked and the editor keeps working with the currently active one.
Example
3) Shapesadd groups of cells by drawing geometric forms
Where to find it
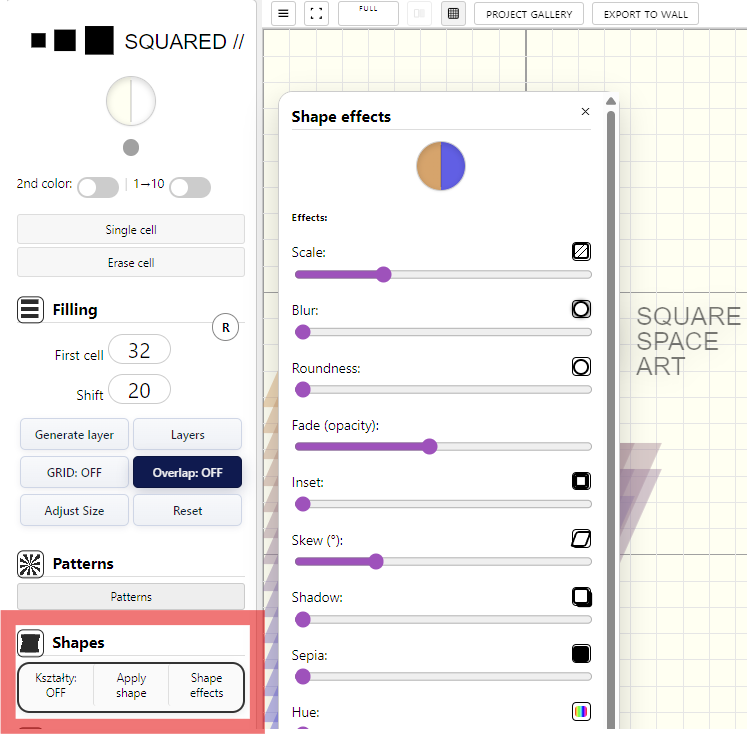
Shapes is used to add whole groups of cells at once by drawing a geometric form directly in the editor. Instead of placing cells one-by-one, you define an area and the application fills that selected shape as a single cell group.
This tool is useful when you want to build stronger geometric structures: larger blocks, directional forms, accents, or irregular compositions that would be slower to create manually with Single Cell.
After choosing the shape tool, mark the intended area in the editor and then confirm it with Confirm shape. From that moment the shape remains in the tables as a saved group of cells and you can continue editing it with color, gradient, and other cell effects in the dedicated submenu.
Example
4) Image Mockupconvert your image into tables
Where to find it
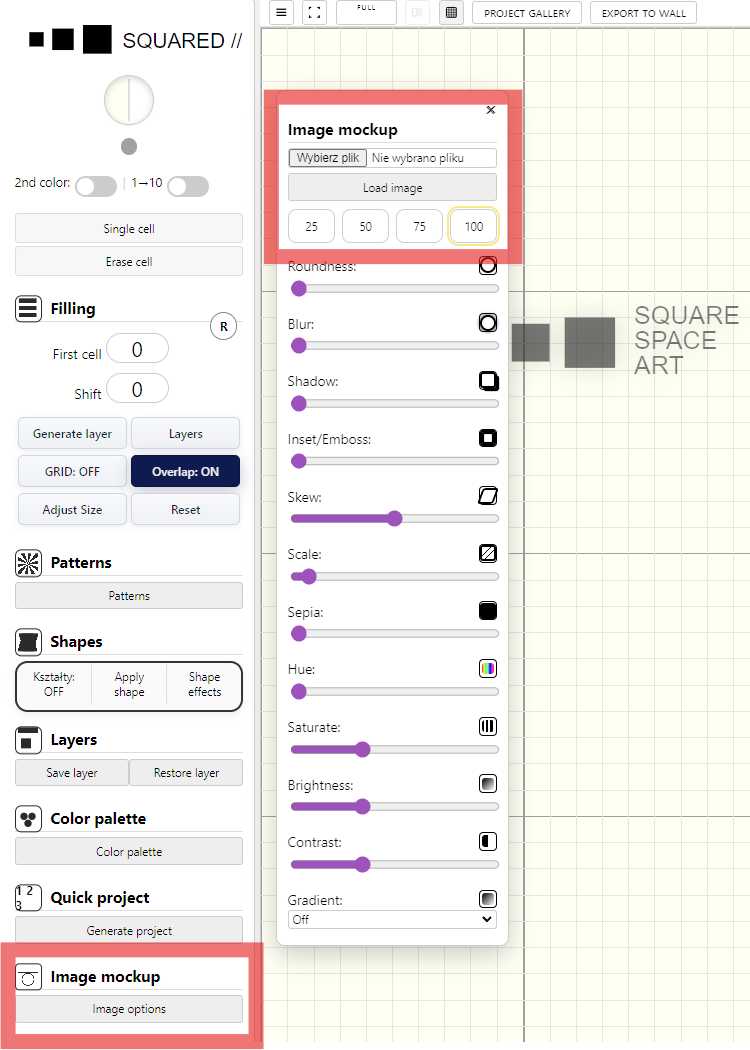
Image Mockup lets you add your own graphic and convert (scale) it into our tables. Choose one of four scaling sizes: 25×25, 50×50, 75×75, or 100×100 cells (the full table).
After selecting the size, choose the file from your disk and click Load image. The image will be inserted into the tables.
Recommended: use images with transparent layers (PNG with alpha) rather than images with a white background. Loaded images can then be processed with additional effects available in the Image Mockup section.
Example
5) Custom Toppingsplace your original images without conversion
Where to find it
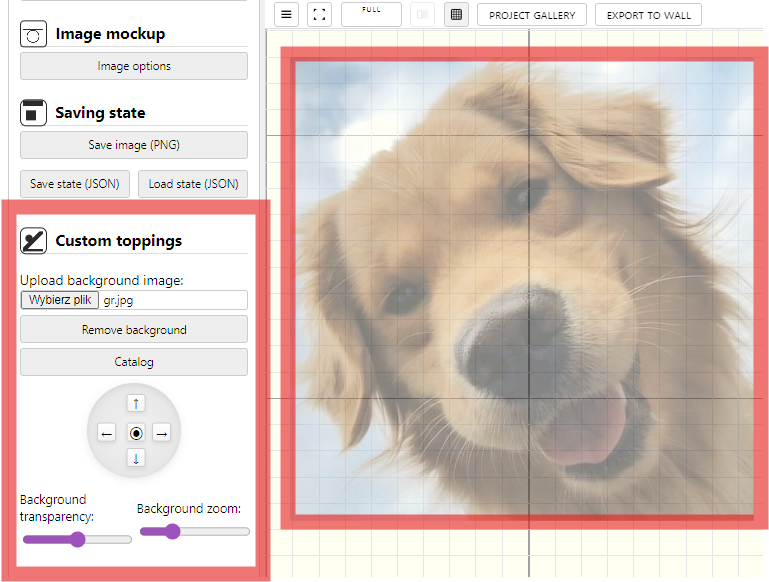
Custom Toppings adds extra ways to place your own graphics on top of the tables. These images are not converted into cells — they stay as standard image files in their original form.
The main controls are adjusting opacity and changing the size using sliders in the side panel (Custom Toppings section). There is also a navigation wheel that lets you move the most recently added image across the container plane.
You can upload fully custom image files and print them in our print shop in a clean, unchanged form.
Example
6) Single Cellhand-place special cells and apply effects
Where to find it
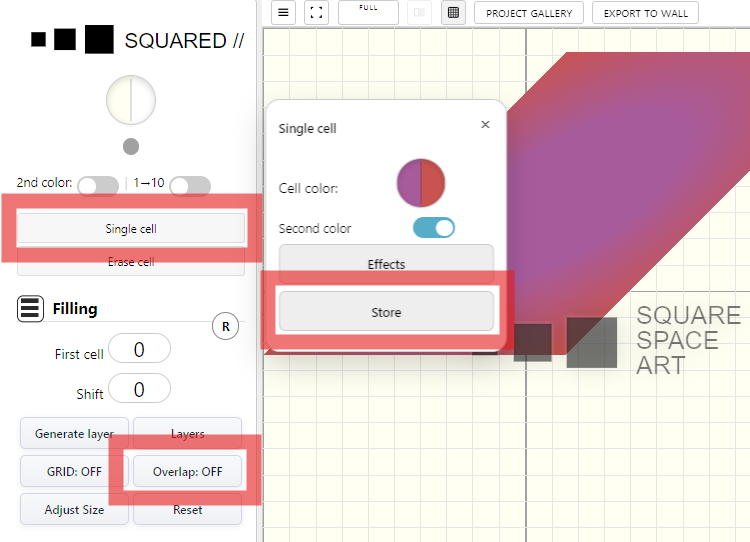
Single Cell is used to manually edit cells placed in a user-selected location on the tables. These can be badges or special cells; when placed in the first table they can be automatically copied to the remaining tables, which makes pattern creation more creative and gives you more options.
When you want to add a new cell and save the previous one, click Store in the Single Cell submenu. From that moment, only the newly added cells receive effects, while the stored cells remain saved on the board.
If you want to work on just one cell and keep adding different effects to it, enable Overlap: OFF (button in the side panel). Then cells are not copied to other tables — they are inserted point-by-point only in the selected place.
Example
Functions
1) Save Layerstore and restore a single layer
Where to find it
The application includes a system for saving the current table state and creating restore points that you can return to at any time.
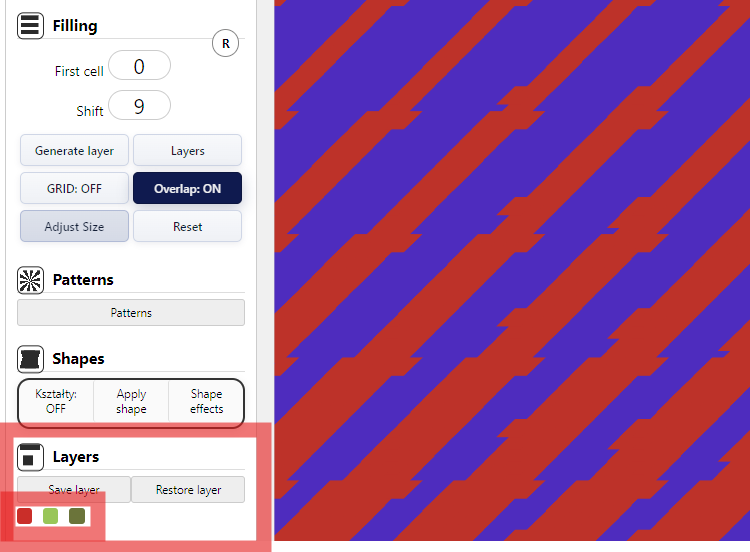
It’s important to save your progress regularly by clicking Save layer. After saving, small square markers appear — these are restore points for that saved state.
Use Restore layer to jump back to any previously saved point and continue working from that exact layer state.
Example
2) Save project to HDDexport and import JSON state
Where to find it
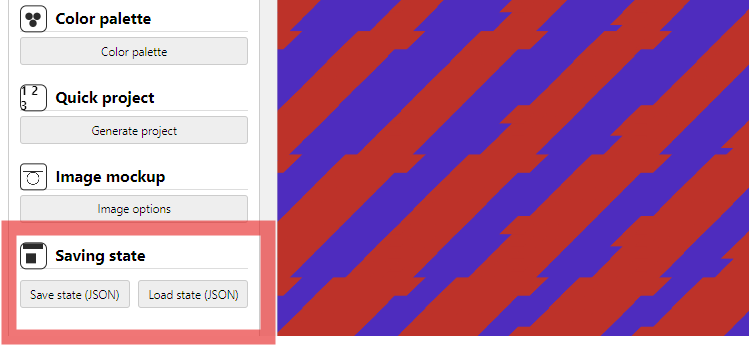
You can save the current tables state to a file on your computer and continue working later by loading that file back into the editor.
Keep in mind: the JSON file stores the tables state, not the state of Custom Toppings images (PNG/JPG). Toppings are not saved into the JSON and will not be restored after loading.
Example
3) Change colorswork with palettes and color sets
Where to find it
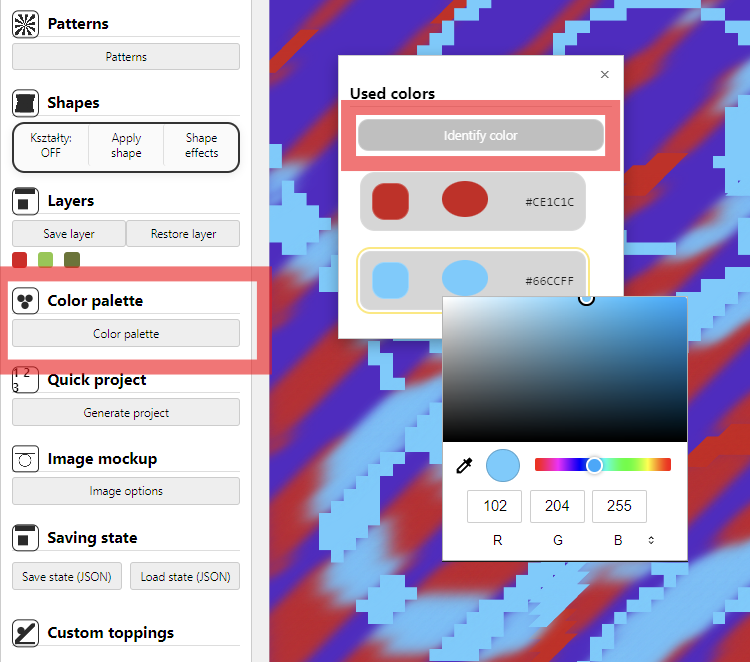
This function lets you change colors across layers, patterns, or any selected color group of cells already used in your project — quickly and precisely.
It’s designed for a safe change: you keep the same structure of overlapping groups (layers/patterns) and preserve effect dependencies while swapping the palette.
Recommended workflow: adjust colors right after loading a JSON project or importing a project from the gallery. Use the dedicated color-identification control, then replace the detected color with your target color.
Example
4) Add signaturestamp your project
Where to find it
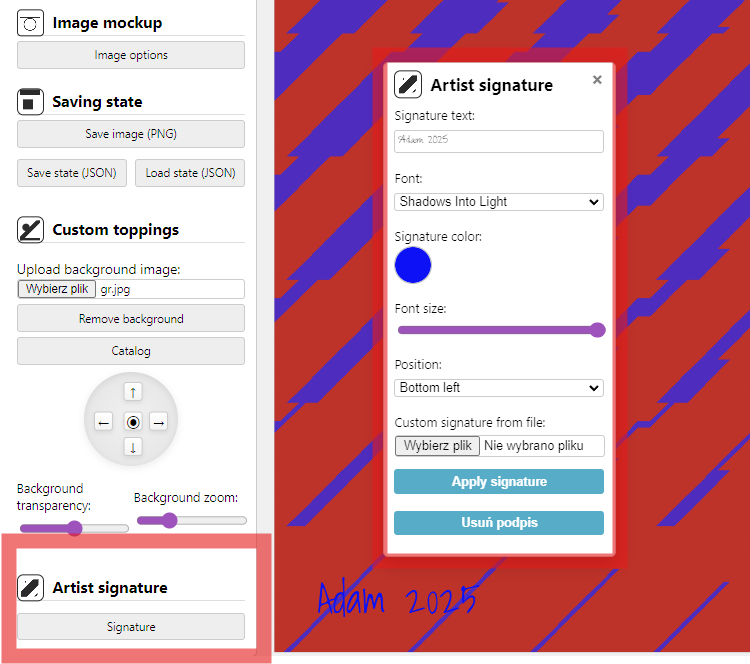
Every project can be signed by its author. Use Signature to add your mark and place it on the left or right side of the artwork.
Example
Cell Effects
1) Visualvisual cell effects
2) Colorcolor transformations
3) Shapeshape-based effects
Save / Load projects as JSON
Save State exports a JSON file containing the full editor state (grid, layers, colors, overlays). Later, use Load State to restore the project exactly.
- In the editor, click Save State.
- A .json file downloads to your computer.
- To restore, click Load State and select the JSON file.
- Everything reappears: layers, cells, overlays, settings.